

Let’s be honest for a moment. When a chemical shipment comes with its paperwork, we often ignore it. We think it’s full of technical terms we don’t understand. We hope we never have to use it.
Ignoring this document is a big mistake. In procurement and engineering, it’s not just about following rules. It’s about avoiding big problems.
But what if we saw these sheets in a different light? What if learning about them was a superpower? This 16-section guide is like a key to understanding chemicals. It helps your team stay safe and follow important rules.
This guide is your secret tool. We’re going from just filing to really understanding these documents. Let’s see compliance as a way to be smarter, not just a task.
Why SDS Mastery Matters in Procurement
Buying chemicals without checking their Safety Data Sheets is like buying a haunted house without knowing about the ghost. You might save money, but you’ll face big problems. In procurement, these problems can lead to legal issues.
An SDS is not just “paperwork.” It’s a legal agreement about the dangers in the chemicals you buy. When you buy something, you’re also taking on its risks. Ignoring the SDS sections is like ignoring important details in a contract.
The rules about SDS are clear. In the U.S., OSHA sees missing SDS as a serious offense. In the EU, ignoring these rules can lead to huge fines and legal trouble.
Without the right SDS, emergencies can be very dangerous. Workers might not know how to protect themselves. This can cause big problems in your workplace.
This makes procurement more than just about saving money. It’s about managing risks. Knowing about SDS sections and GHS pictograms is key. It helps you make safe choices.
Imagine being in a legal battle after an accident. The lawyer will ask if you checked the SDS. Your answer could affect your company’s future.
Big fines are just the start. The real damage is to your company’s reputation and safety record. Knowing about SDS can save your company a lot of trouble.
So, what does it mean to master SDS? It means treating every SDS as a guide for safety. You need to check the dates and understand the sections. This helps you keep your workplace safe.
You’re not just ordering things anymore. You’re protecting your workplace. Every chemical comes with its own set of rules. Your job is to follow them and keep everyone safe.
SDS Structure: The 16 Sections at a Glance
Imagine if every novel you picked up had a different chapter order. One starts with the climax, another buries the protagonist’s name in an appendix. This was the pre-GHS world of Safety Data Sheets. Now, thanks to the Globally Harmonized System, we have a universal template. The 16-section SDS is like a well-organized dossier, a chemical’s biography with each chapter having a distinct purpose.
This consistency is a superpower for procurement and engineering. You no longer have to search through a supplier’s creative writing to find the flash point. It’s always in Section 9. Need the toxicology data? Flip to Section 11. This structure turns a daunting document into a navigable map. The first three sections are your executive summary—the “who, what, and how bad” of the chemical story. If you read nothing else, master these.
Sections 1–3: Identification, Hazards, Composition
This trio is the movie’s opening credits, premise, and villain reveal all rolled into one. It’s your 30-second risk assessment.
Section 1: Identification answers the basic questions. Who made this? Who do I call when the drum starts leaking at 3 AM on a Saturday? It lists the product name, supplier details, and that all-important emergency phone number. This isn’t just paperwork; it’s your first line of defense. A missing or incorrect contact here is a red flag the size of a hazard pictogram.
Section 2: Hazard Identification is the dramatic trailer. Here, the GHS system speaks in a clear, visual language. You’ll find the signal word—either “Danger” for severe hazards or the slightly less ominous “Warning.” Then come the icons: the skull and crossbones for acute toxicity, the flame for flammability. These pictograms are international, transcending language barriers.
More importantly, this section contains the precise hazard statements (H-statements) and precautionary statements (P-statements). An H-statement like “H301: Toxic if swallowed” is brutally specific. It tells you exactly what’s wrong, removing all guesswork.
Section 3: Composition/Information on Ingredients pulls back the curtain on the secret formula. Is it a pure substance or a witch’s brew of a mixture? This part lists the chemical ingredients, their CAS numbers (the chemical equivalent of a social security number), and their concentrations. For mixtures, you see what’s inside that mysterious “proprietary blend.” This data is critical for everything from exposure calculations to regulatory compliance.
| Section | Title | Key Questions Answered | Critical Data Points |
|---|---|---|---|
| 1 | Identification | Who makes it? Who to call in an emergency? | Product name, supplier, emergency contact number. |
| 2 | Hazard Identification | What are the dangers? How severe? | GHS pictograms, signal word (Danger/Warning), hazard statements (H-codes), precautionary statements (P-codes). |
| 3 | Composition | What’s actually in this product? | Chemical names, CAS numbers, concentration percentages (for mixtures). |
Mastering these first three SDS sections gives you immediate situational awareness. You know the players, the risks, and the recipe. It’s the foundation for every decision that follows, from storage requirements to personal protective equipment. The remaining 13 sections? They’re the detailed plot points, but the story’s tone is set right here.
Sections 4–6: First Aid, Firefighting, Spill Response (What to Stage on Site)
Sections four through six of the SDS are like emergency instructions you hope never to need. They turn theory into action, preparing for chemical hazards. It’s like moving from reading a weather forecast to facing a hurricane.

The first three sections warn of dangers. These next three tell you how to react when danger strikes. They’re the difference between knowing a substance is flammable and knowing which extinguisher to use.
The “Oh Crap” First Aid Protocol
Section 4 is like a medical guide for the chemical in question. It outlines what to do for inhalation, skin contact, eye exposure, and ingestion. Each situation requires a specific response to avoid making the injury worse.
For inhalation, it advises moving to fresh air and warns against mouth-to-mouth resuscitation if ingested. For skin contact, immediate washing with plenty of water for 15-20 minutes is key. Eye exposure instructions often require an eye wash station with continuous flow.
Some instructions might seem counterintuitive. “If ingested, do NOT induce vomiting” is common. This prevents pulmonary aspiration, a crisis worse than the ingestion. This section doesn’t just list symptoms; it dictates immediate actions to help until medical help arrives.
Speaking the Firefighter’s Language
Section 5 turns “flammable” into a firefighting plan. It lists suitable and unsuitable extinguishing media. Water might not work for some chemical fires, requiring foam, dry chemical, or carbon dioxide.
This section also warns of fire hazards. A burning solvent might release toxic products like phosgene or hydrogen cyanide. Firefighters need more than standard gear, like chemical-resistant suits and SCBAs.
For engineers, this data guides facility design. It answers questions about fire suppression systems and ventilation. Procurement verifies that the right extinguishing media are on-site.
Containing the Two-Liter Spill Before It Becomes a Two-Million-Dollar Problem
Section 6 deals with accidental releases or spills. It’s about the everyday accidents, not big disasters. Its advice is practical, detailing what to stage on site.
The section outlines personal precautions for the cleanup crew: what PPE is required. It specifies containment methods and how to clean up. It also emphasizes environmental protection, preventing spills from entering drains or waterways.
Most importantly, it warns against ignoring environmental protection. Doing so can turn a small incident into a big problem. Procurement ensures the right equipment is available. Engineering designs secondary containment and drainage controls.
Together, sections 4-6 form the core emergency response playbook. They turn the SDS into actionable, pre-positioned resources. Mastering them means you’re not just compliant—you’re prepared.
Sections 7–8: Handling/Storage, Exposure Controls/PPE (PEL/TLV, engineering controls)
These sections are about preventing problems, not just fixing them. They’re like building codes that keep things safe. They ensure operations are smooth and safe.
The Warehouse Manager’s Bible: Handling and Storage
Section 7 seems simple. It gives basic tips like “store in a cool, well-ventilated place.” But don’t underestimate it. It’s key to keeping your storage safe.
Ignoring this section can lead to big problems. For example, mixing acids and bases can cause dangerous reactions. It’s not something to take lightly.
For those who buy and design, this section is essential. It answers important questions about storage and safety. It helps plan your storage and ventilation needs.
The Technical & Personal Lines of Defense: Exposure and PPE
Section 8 dives into the details. It sets limits for exposure to chemicals. You’ll see terms like OSHA PEL (Permissible Exposure Limit) and ACGIH TLV (Threshold Limit Value). These limits are strict and must be followed.
It talks about engineering controls first. These are designed to keep exposure levels safe. If that’s not enough, personal protective equipment (PPE) is the last resort.
Section 8 is very specific. It doesn’t just say “wear gloves.” It says “Wear nitrile rubber gloves with a thickness of 0.4 mm.” It’s the same with eye protection and respirators.
Being specific about PPE is critical. The wrong gear can be a safety risk. Procurement teams must follow Section 8 closely. The listed gear is not just a suggestion; it’s a necessary defense.
In short, Sections 7 and 8 turn the SDS into a guide for safe work. They show how to avoid hazards, not just deal with them.
Sections 9–10: Physical/Chemical Properties, Stability/Reactivity (Compatibility Matrix)
Sections 9 and 10 are about more than just safety. They’re about designing safety into everything. It’s like building a safe place instead of just having a fire extinguisher.
Imagine knowing a guest is allergic to peanuts and planning a menu without peanuts. For buying and designing, these sections are the guide.
The Chemical’s ID Card and Physical Stats
Section 9 is all about who the chemical is. It’s not about danger yet, but about what it is and how it acts.
You’ll find basic info like its state, color, and smell. But then it gets into the technical stuff. The flash point tells you when vapors might catch fire. Vapor density shows if vapors are heavy or light.
Heavy vapors can hide dangers in pits and basements. Light vapors might collect near ceilings, near electrical stuff. Knowing the boiling point, pH, and specific gravity helps with design and safety.
The Relationship Drama and Your Storage Compatibility Bible
Section 10 is like a list of enemies. It tells you who the chemical doesn’t get along with. It’s about storage compatibility.
It says who the chemical can’t be near. The SDS warns you, “Don’t store near strong oxidizers,” or “Avoid copper alloys.” It’s clear and direct.
It also lists what happens if the chemical gets too hot or burns. You might release bad stuff like phosgene gas. Knowing this helps with firefighting plans.
Using Section 10 means planning how to store chemicals safely. You group them by who they get along with. Below is a simple guide based on common warnings.
| Hazard Class / Group | Example Materials | Incompatible With | Core Storage Rule |
|---|---|---|---|
| Strong Oxidizers | Nitrates, Perchlorates, Hydrogen Peroxide | Flammables, Organics, Reducing Agents | Store separately in a dedicated, non-combustible cabinet. |
| Strong Acids | Hydrochloric Acid, Sulfuric Acid | Strong Bases, Cyanides, Sulfides | Segregate from bases with secondary containment. Never store above bases. |
| Flammable Liquids | Acetone, Ethanol, Solvents | Oxidizers, Peroxides, Heat/Ignition Sources | Store in approved flammable storage cabinets, away from oxidizers. |
| Water-Reactive | Alkali Metals (Sodium), Some Acid Chlorides | Water, Aqueous Solutions, Moist Air | Store in water-tight containers in a cool, dry area. Use inert atmospheres if needed. |
Your real-world storage compatibility matrix will be detailed. It’s based on every SDS you handle. This table is just a starting point. The goal is to make storage safe and boring.
Mastering these sections means you’re not just avoiding accidents. You’re designing a system where they’re almost impossible. That’s the power of good data.
Sections 11–12: Toxicology/Ecology (Acute/Chronic Endpoints, Aquatic Toxicity)
The toxicology and ecology sections of an SDS tell us what happens when chemistry meets biology. It’s often not good. These sections help us understand the consequences of accidents. They answer tough questions like: What does this stuff actually do to living things? And what does it leave behind in the environment?
For teams buying and engineering, this is important. It’s about long-term responsibility and peace of mind. You’re not just buying a chemical; you’re taking on its environmental impact.
The Horror Story: Section 11 Toxicology Information
Section 11 gets personal. It shows how a substance affects the human body in bad ways. It’s like a chemical’s medical chart, written by Stephen King.
This section talks about acute and chronic toxicity. Acute toxicity is the immediate harm from one exposure. It’s like a car crash. You’ll see the LD50 here, a measure of how deadly it is.
Chronic toxicity is the slow damage from repeated exposure. It can cause cancer, organ damage, and neurological problems. It’s a slow reveal of harm.
It talks about how you can get exposed: through breathing, skin contact, or eating it. Symptoms are listed in a clinical way. This section shows safety isn’t just about avoiding spills. It’s about avoiding the harm that follows.
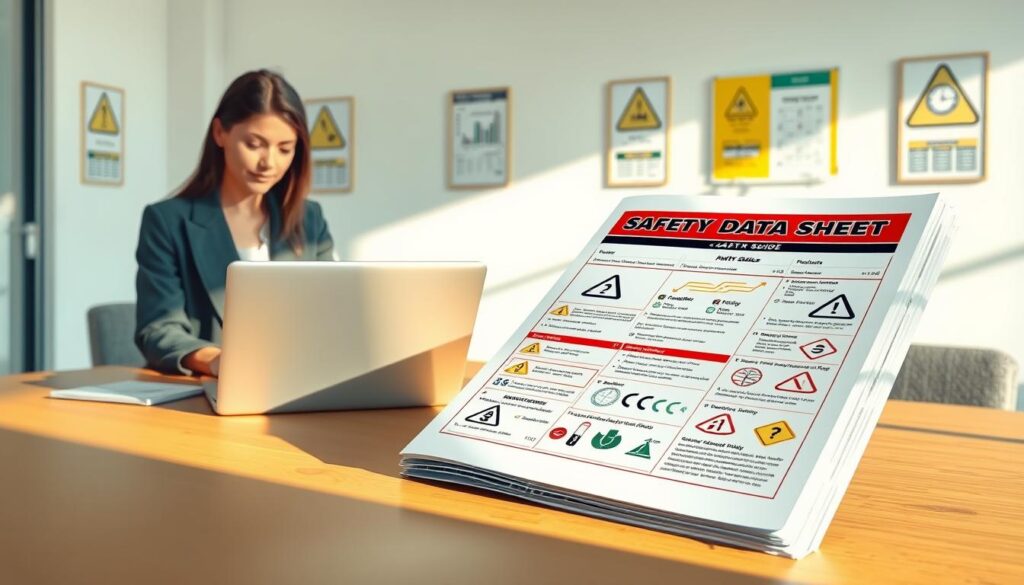
 showcasing Sections 11 and 12 on toxicology and ecology, reflecting aspects of aquatic toxicity and chronic health effects. The background displays a well-organized lab with scientific posters and natural light filtering through large windows, creating a sense of professionalism and clarity. The overall mood is informative and focused, emphasizing safety and meticulous analysis in environmental health.")
The Environmental Footprint: Section 12 Ecological Information
Section 12 looks beyond the factory. It asks: What happens if this chemical gets into the wild? While not required by OSHA, good suppliers include it. Ignoring it is like ignoring a car’s emissions rating.
Ecotoxicity data shows how harmful it is to aquatic life, birds, or soil organisms. The numbers can be scary. A high rating means a small spill could harm a stream.
Then, there’s the environmental fate: persistence, bioaccumulation, and mobility. A persistent chemical doesn’t break down easily. It’s like plastic, lasting for decades. Bioaccumulation means it builds up in living things, like mercury in fish. Mobility shows how it moves through soil and water.
This section is key for planning for environmental compliance and spill responses. It’s about understanding the chemical’s journey through the environment.
For those buying, Section 12 affects ESG scores and community relations. For engineers, it guides containment design and wastewater treatment. It turns a chemical into an environmental stakeholder.
Together, Sections 11 and 12 paint a full picture of risk. They show what the chemical is and what it does. In today’s world, that’s not just data—it’s doing your homework.
Sections 13–15: Disposal, Transport, Regulatory (RCRA, DOT/IMDG/IATA, TSCA/REACH flags)
Sections 1-12 are about living with a chemical. Sections 13-15 are about its funeral and travel plans. It’s where the SDS gets practical about endings and crossings. You’re not just buying a substance—you’re adopting a lifecycle with paperwork.
Think of it as the chemical’s retirement plan, travel documents, and citizenship papers all rolled into one. These sections answer two critical questions: How do we dispose of this properly? And can we move it across borders legally?
The Chemical’s Retirement Plan
Every chemical eventually reaches retirement age. Section 13 is its golden parachute—or more accurately, its proper disposal protocol. This isn’t about dumping; it’s about dignified departure according to RCRA regulations.
The Resource Conservation and Recovery Act (RCRA) isn’t just bureaucracy. It’s the difference between responsible closure and creating your own personal Superfund site. Section 13 should point you toward certified hazardous waste handlers and approved disposal methods.
What you’re looking for here: specific waste codes (D001 for ignitable, D002 for corrosive), treatment recommendations, and contractor requirements. If it says “dispose of in accordance with local regulations,” consider that a red flag. Your supplier should know better.
The Chemical’s Travel Documents
This section is the chemical’s passport and visa information. Before anything leaves your dock, Section 14 provides the essential shipping intelligence. Miss this, and your shipment becomes contraband.
The holy trinity of chemical transport lives here:
- UN Number: The chemical’s international ID (like UN1993 for flammable liquids)
- Proper Shipping Name: Not what marketing calls it, but what DOT recognizes
- Hazard Class & Packing Group: How dangerous it is and how tough the packaging must be
DOT regulations don’t care about your creative labeling. They care about these codes. Get them wrong, and you’re facing fines that make corporate accounting departments weep. For international shipments, you’ll also find IMDG (sea) and IATA (air) codes here.
The Regulatory Passport Check
This is the customs and immigration checkpoint for chemicals. Section 15 tells you whether your substance is even legal to use in your jurisdiction. It’s the compliance reality check.
Key flags to look for:
| Regulation | What It Means | Red Flag to Watch For |
|---|---|---|
| TSCA (Toxic Substances Control Act) | Is the chemical listed on the US inventory? | “Not listed” or “Pending review” status |
| REACH (Registration, Evaluation, Authorization of Chemicals) | EU authorization status | Substance of Very High Concern (SVHC) listing |
| Canadian DSL (Domestic Substances List) | Canadian compliance status | Not on DSL or NDSL lists |
Here’s the tricky part: Under some regulations like OSHA’s HazCom or Canada’s HPR, suppliers can legally skip Sections 12-15. But the good ones don’t. A complete Section 15 shows a supplier who understands global compliance.
When you see TSCA flags or REACH authorizations missing, ask questions. Is this chemical sunsetting in your market? Are there pending restrictions? This section isn’t just paperwork—it’s your early warning system for regulatory changes.
Sections 13-15 transform the SDS from a safety manual into a compliance roadmap. They tell you how the story ends and whether you can take the show on the road. Skip them, and you’re navigating chemical retirement and international logistics blindfolded.
Revision History (Change Control Triggers)
Thinking Section 16 is just paperwork? That’s like playing with chemicals without knowing the risks. The date stamp and notes are your warning signs. In the world of chemical safety, what was safe yesterday could be a problem today or tomorrow.
The old rule of updating Safety Data Sheets every three years is outdated. OSHA’s new rules say you must update them within 90 days if new data comes in. This includes changes in hazard levels or how to protect yourself.
The Living Document Doctrine
An SDS is not a fixed document. It’s a living guide that changes as we learn more about a substance. It’s like updating your phone’s software. Using an old SDS is like running an outdated business.
For those who buy products, this means a big responsibility. You need to keep track of SDS versions. But it’s also a chance to work with suppliers who value safety data updates.
| Trigger Event | Regulatory Requirement | Procurement Action | Risk of Inaction |
|---|---|---|---|
| New toxicology study changes hazard classification | SDS update within 90 days | Immediate requalification with supplier; update all internal documents | Using obsolete PPE; improper handling procedures |
| Discovery of previously unknown reactivity | SDS update within 90 days | Review storage compatibility; audit current inventory locations | Potential chemical reaction incident; fire or explosion risk |
| Regulatory body changes exposure limits (PEL/TLV) | SDS update within 90 days | Evaluate engineering controls; reassess ventilation requirements | Employee overexposure; OSHA citations |
| Supplier reformulates product (even slightly) | New SDS required immediately | Treat as new substance; full safety review before use | Unknown hazards from new components |
| Three years have passed, no update | Employer must seek updated SDS (some jurisdictions) | Formal request to supplier; document follow-up | Missed interim updates; accumulating obsolescence |
The table above is more than a checklist. It’s your guide to keeping safety practices up to date. It helps you avoid falling behind in safety standards.
Many organizations wait until they receive an updated SDS to act. But a proactive approach is better. This means setting up triggers in your procurement process for updates.
Building Your Revision Radar
Start by checking the revision date of every SDS you get. Set a rule to ask for updates if it’s over 18 months old. Keep a digital log of when you ask for updates and what you get back.
Next, compare the new SDS version to the old one. Look for changes in hazard levels, precautions, and how to protect yourself. Each change should lead to updates in your safety procedures and training.
This change is big. You’re moving from seeing safety data as static to dynamic. Your suppliers become key partners in keeping you safe. And Section 16 becomes a key tool for managing changes.
Remember, using an old SDS is like not having one at all. The revision history is your proof that your safety map is current.
Verifying Supplier SDS Quality & Revision Cadence
Even with the best SDS management system, outdated supplier documents can sink your efforts. The SDS is like a safety guide for your products. If it’s wrong, everything can go wrong.
Suppliers must give accurate SDSs when they sell you something. No excuses. A link to check later is not enough. You must have the right safety information right away.
OSHA wants you to check SDSs regularly. This is usually every three years or when new hazards are found. Waiting for suppliers to update is risky for your workers’ health. You need a system, not just hope.
Using your buying power can help. Make sure you get accurate safety information. Treat the SDS as important as the product itself.
Have a checklist for when you receive SDSs. Ask important questions:
- Is it the full, glorious 16 sections? No cliffhangers allowed.
- Is it bilingual if your workforce requires it?
- Does the 24-hour emergency contact number actually ring?
- Is Section 16’s revision history current, or does it read like ancient history?
Ask for the document file itself. A link is temporary, but a PDF is permanent. Have a regular review schedule, like with your supplier performance.
How suppliers handle SDSs shows their safety attitude. If they ignore SDSs, they might ignore safety. Pay attention to this.
Knowing when an SDS is needed is basic. But checking its quality and currency is professional. Don’t just check the box; check the content and the supplier’s commitment.
Translating SDS to SOPs, JHAs, and Training Cards
Think of the Safety Data Sheet as the original screenplay for your workplace safety blockbuster. It’s packed with plot points, character motivations (hazards), and dramatic tension. But a screenplay isn’t the movie. Your job is to be the director, translating that raw script into actionable scenes the crew can perform safely, day after day.
The SDS gives you the “what” and the “why.” You, as the sage on the ground, must provide the precise “how.” This is the alchemy that turns dry compliance into a living safety culture.
Let’s break down this translation process. The SDS is famously generic. Section 8 might say “use respiratory protection.” That’s like a script noting “character enters.” It’s your Job Hazard Analysis (JHA) that specifies the exact role: “Wear a 3M 6000 Series half-mask respirator with organic vapor cartridges (OV) for Task A, duration not to exceed 4 hours.” That’s directing.
Sections 7 and 10 offer data on handling and stability. Your Standard Operating Procedure (SOP) turns that into a step-by-step guide. It dictates the exact secondary containment needed, the minimum distance from incompatible materials, and the protocol for drum inspection before use.
Then there’s the crew’s call sheet. The stark pictograms and GHS hazard statements from Section 2 are perfect for one-page training cards. These are the visual cues you post at the point of use. They don’t explain the toxicology; they scream “Wear Gloves!” or “Flammable—No Sparks!” in a language everyone understands instantly.
This translation isn’t just busywork. It’s risk management in its purest form. The table below maps the source material to the final product, showing how abstract data becomes concrete action.
| SDS Section (Source Material) | Safety Document (Final Product) | Translation Action |
|---|---|---|
| Section 2: Hazards Identification GHS pictograms, H/P statements |
Training Card / Label Visual job aid for operators |
Distill complex text into universal symbols and clear, imperative commands (e.g., “NO OPEN FLAME”). |
| Section 7: Handling & Storage General precautions, conditions |
Standard Operating Procedure (SOP) Step-by-step work instructions |
Specify exact tools, containment, sequencing, and quality checks for routine tasks. |
| Section 8: Exposure Controls/PPE Generic controls (e.g., “ventilation”) |
Job Hazard Analysis (JHA) Task-specific risk breakdown |
Define the exact PPE model, engineering control settings, and exposure limits for each discrete job step. |
| Sections 4-6: Emergency Measures First aid, firefighting, spill response |
Emergency Action Plan (EAP) Annex Site-specific response protocols |
Detail the location of specific spill kits, the class of fire extinguisher to use, and the exact first-aid procedure for a splash in Eye Wash Station B. |
Notice a pattern? The SDS informs, but your documents command. They move from the passive voice of “should be stored cool” to the active voice of “Store at below 25°C in designated flammable cabinet.” This shift is everything. It eliminates ambiguity, which is the enemy of safety.
So, the next time you receive a perfect, compliant SDS, don’t just file it. See it as the first draft. Your masterpiece—the SOPs, JHAs, and training cards that actually protect people—is waiting to be written. That’s how you build a program where safety isn’t just a section in a binder. It’s the script everyone follows by heart.
Templates: SDS Review Checklist & Compatibility Chart
Let’s move from theory to the toolbox. Knowledge without action is just words. I’m giving you two tested tools to make your SDS skills real.
The first is your SDS Review Checklist. It’s like a scorecard for your team. It turns Section 8’s safety gear tips into clear steps. It also checks for outdated SDSs, which are hidden dangers.
The second is your Chemical Storage Compatibility Chart. It’s a blueprint for your storage area. You fill it with info from Section 10 of each SDS. It helps you keep dangerous chemicals apart, making your area safer.
These templates are your tools. They make every section we’ve talked about real. Print them and use them in your work. You’ll feel more confident and safe.
You’ve gone from just reading SDSs to using them to improve safety. These documents are now tools for better work and safety. Now, go make your workplace safer.