

Let’s face it. Dealing with chemical safety sheets and warning labels is not exciting. It’s like searching for a needle in a haystack. It feels like a never-ending task.
But, mishandling these documents is serious. It can lead to big problems. It’s not just about following rules. It’s about keeping everyone safe in a dangerous workplace.
The Globally Harmonized System (GHS) is the key to safety. OSHA’s Hazard Communication Standard makes sure everyone follows it. Its main goal is to keep people safe.
This guide will help you understand GHS labeling and SDS management. We’ll make it easy to follow. We aim to make compliance fun and strategic, not a chore.
GHS elements: signal word, pictograms, H/P statements, supplier info
Understanding a GHS label is not about reading fine print. It’s about grasping a universal visual language for safety. It’s like a chemical’s passport, with every detail important for safe handling. A compliant label is not just a suggestion; it’s a detailed guide with six key parts.
Missing one part means the safety message is incomplete. Let’s explore this safety guide, piece by piece.
The Signal Word: Your First Clue to Severity
The signal word is the label’s headline. It doesn’t beat around the bush. You have only two choices: “Danger” or “Warning.” It’s like the difference between a huge fire and a small one.
“Danger” warns of serious health threats and flammables that can catch fire easily. “Warning” alerts you to less severe but serious risks. This binary choice gives you immediate context. There’s no “Caution” or “Maybe.” It’s like someone yelling “Duck!” versus calmly saying, “Heads up.”
Pictograms: The Universal Language of Hazard
If words can’t get the message across, symbols can. Pictograms are the most recognizable part of the GHS system. Each symbol is a black image on a white background, in a bold red diamond. They work across languages.
A flame means something is flammable. A skull warns of acute toxicity. A corroding surface means, well, corrosion. These symbols are not just icons; they’re a quick way to understand hazards without needing to read.
Using the right pictograms is essential. They help you quickly spot hazards and react safely. They’re the most basic way to communicate safety.
Hazard and Precautionary Statements: The Fine Print That Matters
Here’s where the details are. Hazard statements (H-statements) describe the risk in science-based terms. They start with a code like “H225” but are written clearly: “Highly flammable liquid and vapor.” No room for creative writing.
The precautionary statements (P-statements) tell you what to do about it. They cover prevention, response, storage, and disposal. Think of H-statements as the diagnosis and P-statements as the treatment plan.
Together, these hazard statements and precautionary instructions tell you what the chemical can do and how to stay safe. They turn vague danger into clear, actionable advice.
Supplier Information: The Credibility Anchor
Lastly, the label must name its source. The supplier information—company name, address, and phone number—is the accountability clause. It’s like the “studio logo” on our movie poster.
This isn’t about branding. It’s a lifeline. In an emergency, responders need to know who made the product to get specific technical data. It ensures there’s always a responsible party behind the warning. A label without this is anonymous, and in safety, that’s a major red flag.
When these six elements—product identifier, signal word, pictograms, hazard statements, precautionary statements, and supplier info—align, you have a complete safety tool. It’s a system designed for clarity in chaos. Getting this right isn’t just about following rules; it’s the basis for every informed decision you’ll make with that chemical.
Workplace/secondary container labeling options (full/abbreviated)
Secondary container labeling is like a game of telephone. The original message must be passed accurately, or the consequences can be dire. You start with a pristine manufacturer’s label, a masterpiece of compliance. Then you decant the contents into a smaller jug, a spray bottle, or a beaker. Poof. The legally perfect label vanishes, leaving you with a mysterious liquid and a looming sense of regulatory dread.
This is the secondary container conundrum. The good news? OSHA’s rules here are refreshingly performance-based. They care less about the font size and more about whether the message gets through. Your mission, should you choose to accept it, is to ensure anyone who encounters that workplace container understands its hazards as well as if they were reading the original shipping label.
Your Labeling Menu: From Full GHS to Abbreviated
Think of your options as a choose-your-own-adventure book for the responsible professional. You have a spectrum of choices, each with its own analytical trade-off.
The Full GHS Replication: This is the luxury sedan option. You replicate the entire primary label—product identifier, signal word, pictograms, hazard and precautionary statements, supplier info. It’s unambiguous and leaves zero room for interpretive dance with an OSHA inspector. It’s the gold standard for workplace labels when clarity is non-negotiable.
The Abbreviated Label: Here’s where the “performance-based” rubber meets the road. You can use a simpler tag, but it must provide, and I quote, “the same level of understanding.” This is not a loophole for creative minimalism. My witty advice? Treat this like a smart casual dress code. At a minimum, your secondary container labels need the product name and the core hazards. Pictograms are your best friends—a universal language that cuts through jargon.
Other tools in your arsenal include signs, batch tickets, or even well-placed operating procedures. These can work for stationary process containers, acting as a permanent cheat sheet for anyone nearby.
And then there’s the famous exemption: containers for “immediate use.” This is the chemical equivalent of a cafeteria tray—used and cleaned within a single shift by the person who filled it. It doesn’t need a nametag. But stretch the definition of “immediate,” and you’ve just invented a compliance headache.
So, what’s the sage analysis? While the rules offer flexibility, that flexibility is a test of your judgment. An abbreviated label might save five minutes today. A full GHS label might save a costly citation—or worse—tomorrow. In the high-stakes game of hazard communication, over-communication is rarely a losing strategy.
Read‑across to NFPA/HMIS for in‑house visuals
NFPA and HMIS are like classic rock in hazard labeling. GHS is the new album, and a read-across is like the liner notes. It helps fans understand the new tunes.
For a team used to NFPA 704 diamonds and HMIS numbers, GHS pictograms might seem like abstract art. Your goal is to connect the old with the new, not to erase the past.
A read-across is like a bridge. It compares GHS pictograms with NFPA or HMIS ratings side by side. This isn’t for shipping labels. It’s for in-house signs and training that speak both languages.
Why do this? Intellectual empathy. The best ghs labeling and sds management programs respect safety knowledge as cultural. They work with what your team already knows.

Building Your Visual Translation Guide
Creating a read-across is about communication, not just rules. Start with the biggest challenges. Use charts in key places like storage and mixing areas.
For example, a sign near a solvent drum might show the GHS flame pictogram next to NFPA’s red “3” and HMIS “F”. This says, “This is flammable. We’ve always said that. Now, here’s the new symbol.”
This approach makes your compliance upgrade a learning moment. It shows respect for experience and connects the new system to it. This builds trust, not just compliance.
| Hazard Category | NFPA 704 Diamond (Color/Number) | HMIS (Color/Number) | GHS Pictogram & Signal Word |
|---|---|---|---|
| Flammability | Red Section, Number 3 | Red Bar, Number 3 | Flame Pictogram, “Danger” |
| Health Hazard | Blue Section, Number 2 | Blue Bar, Number 2 | Health Hazard Pictogram, “Warning” |
| Instability/Reactivity | Yellow Section, Number 1 | Yellow Bar, Number 1 | Exploding Bomb Pictogram, “Warning” |
| Corrosion | Often implied in Health (Blue) | White Bar, “C” for Corrosive | Corrosion Pictogram, “Danger” |
| Acute Toxicity | Blue Section, Number 4 | Blue Bar, Number 4 | Skull & Crossbones Pictogram, “Danger” |
The table above is for starting conversations, not making labels. It shows how the new pictograms match the old numbers. This creates a clearer picture of hazards.
Effective ghs labeling and sds management is about speaking many languages. By respecting the past and teaching the new standard, you create a safer culture. Every team member becomes fluent in safety.
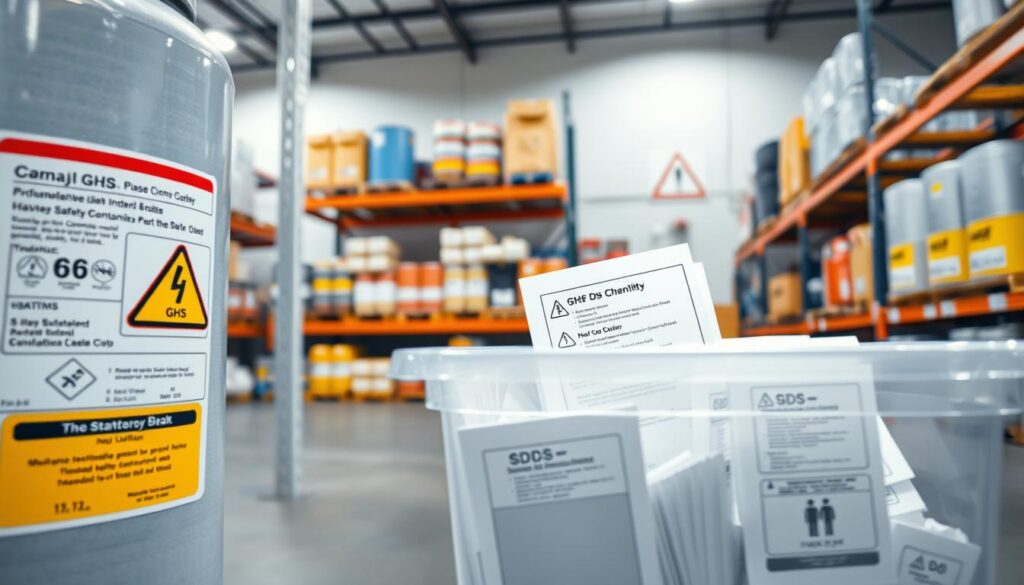
SDS essentials by section and locating storage/handling requirements
Every hazardous chemical has a 16-part dossier. Knowing which sections to look at is key to being good at HazCom. The Safety Data Sheet is like a detailed guide, covering everything you need to know.
You don’t have to remember everything. Think of it like a book where you choose what to read next. Your goal is to find the important parts for your job.
Your Cheat Sheet to the First Eight Sections
Sections 1 through 8 are the most important. They have the basic information you or a first responder might need quickly. Here’s a quick guide:
- Section 1: Identification. This section tells you who the chemical is and who made it.
- Section 2: Hazards Identification. It explains the dangers of the chemical, including pictograms and H statements.
- Section 3: Composition. Here, you find out what’s really in the chemical, not just its name.
- Section 4: First-Aid Measures. It shows you what to do if someone gets exposed to the chemical.
- Section 5: Fire-Fighting Measures. This section tells you how to fight a fire without making it worse.
- Section 6: Accidental Release Measures. It’s your guide for cleaning up spills and protecting yourself.
- Section 7: Handling and Storage. This is the most important section for keeping the chemical safe.
- Section 8: Exposure Controls/Personal Protection. It tells you how to stay safe while using the chemical.
Learning about these sections is the first step in managing chemicals safely. It makes a big document useful for everyday work.
Now, let’s talk about where to store and handle these chemicals. The answer is in Section 7: Handling and Storage.
This section is critical for keeping chemicals organized and safe. It gives you specific instructions on how to handle them. It also tells you where to store them, like in a cool, dry place.
It also warns you about which chemicals don’t mix well. Storing an acid next to a base can cause problems.
Using Section 7 correctly is more than following rules. It’s about creating a safe work environment. It turns safety into a daily habit.
Version Control, Access (Digital Kiosks/Mobile), and Training Records
In today’s world, an old safety data sheet is like a slow dial-up modem. It’s outdated and dangerous. Your safety program needs three key things: accurate info, quick access, and proof your team gets it. Master these, and you go from following rules to truly understanding your operations.
The Update Log: Why SDS Version Control Isn’t Optional
An SDS is not a static document. It’s a living file with a revision date in Section 16. SDS version control keeps your program up-to-date. It replaces old info with the latest, legal facts.
Without version control, you make decisions with old data. Formulation changes and new handling precautions are missed. A good version control process finds updates and removes old info.
Immediate Access: From Binders to Digital Kiosks
OSHA says your SDS must be “readily accessible.” This means it should be right there, not in another room or on a distant drive. The old binder is reliable but slow.
Now, we have digital kiosks and mobile tablets for quick access. It’s like having a safety streaming service. But what if the internet goes out? You need a local backup to keep your SDS library available.
The Paper Trail: Training Records as Your Exhibit A
Even with great SDS version control and quick access, you need proof your team was trained. Training records are key. They show who knew what and when.
This isn’t just a sign-in sheet for a yearly talk. It’s a detailed log of SDS updates and who handled them. When auditors or investigators ask, these records prove your team was informed.
Version control, quick access, and training records form a strong loop. If one part fails, the whole system breaks. Get it right, and your safety data becomes a valuable asset, not just old files.
Supplier due diligence and language/localization needs
Think of your chemical supplier as a blind date; you hope they’re honest, but you better do your homework. Your entire ghs labeling and sds management program leans on their integrity. If their documentation is a mess, you’re building your safety castle on quicksand.
This section tackles two pillars often treated as afterthoughts. First, the detective work you must do before the chemical arrives. Second, ensuring the safety message actually lands with the people holding the container.
The Pre‑Arrival Audit: Vetting Your Source
Supplier due diligence isn’t paperwork. It’s a pre‑emptive strike against compliance failure. That mandatory supplier information—name, address, phone number—on the label and SDS Section 1? It’s your first clue. Is it accurate and current, or a ghost office?
Your audit checklist should be ruthless. Are their SDSs in the proper 16‑section format, or a scrambled jumble? Are their pictograms and hazard statements GHS‑perfect, or a creative interpretation? A supplier with sloppy docs is a liability, not a partner.
This isn’t about being difficult. It’s about not inheriting someone else’s problem. You wouldn’t buy a used car without a vehicle history report. Don’t accept a drum of solvent without a supplier history report.

When Words Fail: The Localization Imperative
Now, let’s assume the SDS and label are technically flawless. But what if your workforce reads them in a different language? An English‑only precautionary statement sheet in a Spanish‑speaking crew is just elegant wallpaper. OSHA’s mandate for comprehensibility isn’t a suggestion.
This is where language and localization move from nice‑to-have to non‑negotiable. The genius of GHS pictograms is their design as a universal visual language. They’re the safety equivalent of emojis—meant to transcend words.
Yet, words are important. For complex handling instructions, translation is key. Your program might need maintained SDSs in Spanish or Vietnamese. It might require bilingual workplace labels. The goal is cultural resonance: ensuring the message of safety isn’t lost in translation.
Integrating these two fronts—rigorous supplier vetting and intelligent localization—creates a robust, human‑centric system for ghs labeling and sds management. It closes the loop from the source to the end‑user, where safety truly happens.
Label durability: chemicals, abrasion, temperature, print methods
Having perfect pictograms and hazard statements is great, but if the label can’t last, it’s pointless. Durability is about lasting, not just looking good. It’s the difference between a warning that lasts and one that fails quickly.
Think of your label facing four tough foes: chemicals, abrasion, extreme temperatures, and print methods. If it fails in any area, the whole safety system fails.
Chemical Assault: More Than a Splash
Labels face a sea of acids, solvents, and caustics. A paper label reacts like sugar in hot tea. It dissolves. Legibility isn’t just about ink; it’s about the substrate’s will to live.
You need materials that resist chemicals. This means synthetic facestocks and protective laminates. The goal is to keep pictograms clear after a spill.
Abrasion and the Relentless Elements
It’s not just chemicals. Brushes, tools, and gloves can damage labels. UV light fades information. Add humidity, water, and temperature changes.
Each element tests the label’s adhesion. A peeling corner invites the message to tear. Your label material must be UV-stable, water-resistant, and have a strong adhesive.
The Print is the Thing
Even the toughest label material fails if printed with an office inkjet. Standard printer inks smear, fade, and wash off. They’re not made for industrial use.
Industrial printing systems are the answer. Devices like the DuraLabel Toro Max use thermal transfer with resin ribbons. They create marks that last. The result? Text and symbols that resist solvents, abrasion, and fading.
Consider this simple comparison:
- Office Printer & Paper Label: Low cost upfront. Ink smears with moisture. Paper degrades quickly. Adhesive fails under heat/cold. A temporary solution at best.
- Industrial Printer & Synthetic Label: Higher initial investment. Ink is bonded to the material. Synthetic face resists chemicals and tearing. Engineered adhesive lasts. It’s a permanent safety asset.
The choice of print method directly protects your hazard statements. A faded “Danger: Flammable” is no statement at all.
In the end, label durability is an active choice. It’s about protecting your safety information as much as your workers. A warning that disappears isn’t a warning—it’s a memory of a precaution you once took.
Periodic audits and corrective actions
Let’s face it: without regular checks, even the best safety plans can fade away. A HazCom program is always evolving, not static. It deals with new chemicals and updates SDSs, and sometimes, it even gets a new, unlabeled item.
Think of audits as your facility’s yearly check-up. It’s not just about catching mistakes. It’s about keeping the process safe before it becomes a real issue.
The Art of the Spot Check
Doing an audit is like being a detective and a safety expert. You’re not just looking at labels. You’re checking if the label matches the Safety Data Sheet and if the pictogram is correct. And, yes, that SDS date from 2016 is outdated.
A good audit follows a checklist. You need to check if all hazard statements are clear and if the supplier info is up-to-date. It’s like a game of “Spot the Deviation” for a safer workplace.
From Diagnosis to Cure: The Corrective Action Loop
Finding a problem is just the start. The audit report needs to lead to corrective action. This is where you fix the issue, not just identify it.
A corrective action must be clear, assigned, and tracked. “Update the SDS for acetone” is a task. “Procurement will request a GHS-compliant SDS from Supplier X by Friday, with verification filed in the HazCom binder by EOD Monday” is a plan with a deadline and a check-off.
This loop—audit, find, fix, verify—is the heart of continuous improvement. It turns a static program into a dynamic, learning system. Your Hazard Communication plan gets better, leaner, and more resilient with each cycle.
To make this concrete, here’s how common findings typically translate into actions:
| Common Audit Finding | Root Cause (Often) | Corrective Action Example |
|---|---|---|
| Faded or unreadable workplace label on a secondary container. | Label material not chemical-resistant; poor print quality. | Replace with a chemically durable, pre-printed GHS label. Retrain staff on proper labeling for transfers. |
| SDS on file is several revisions old. | No process for automatic SDS updates from supplier. | Contact supplier for current SDS. Subscribe to their SDS update service or set a calendar reminder for manual re-check in 6 months. |
| No label on a portable mixing container in use. | Employee in a hurry; label maker not accessible. | Place blank GHS label templates and a marker at the mixing station. Conduct a 5-minute refresher training on immediate-use container rules. |
| GHS pictogram on label doesn’t match the hazard class in Section 2 of the SDS. | Human error during label creation; using an old template. | Quarantine the chemical until verified. Update the master label template. Audit all labels from that batch. |
| Employees unaware of SDS digital access point location. | Training was completed, but not reinforced; new hires not informed. | Add SDS kiosk location to new hire onboarding checklist. Post clear signage above the kiosk. Mention it in the next team huddle. |
The table isn’t just a list. It’s a guide. The final step is often missed: verification. Check that the fixes worked. Was the new label applied? Is the updated SDS accessible? This proves your HazCom program is active and improving.
Templates: label checklist and SDS index
Every good strategy session ends with the tools to execute. It’s like the difference between a concert’s theory and its playable score. Our free Safety Data Sheet Template Sample Report is your first backstage pass.
Your GHS Label Quality Control
A robust GHS label checklist is your final inspector. This simple document checks if every signal word, pictogram, and hazard statement is there. It turns guesswork into a clear pass/fail for your workplace labels.
The Master Chemical Ledger
An SDS index is your program’s central nervous system. It lists every chemical on site, its SDS location, and revision date. It makes audits and employee access quick, not a scavenger hunt.
Together, these templates are the cheat sheets you actually need. They turn complex hazard communication into a routine you can follow with confidence. Use them, and you’re not just following rules—you’re conducting the safety program.