

Imagine your storage area is like a high-stakes dinner party. Some guests get along well. But others, if they meet, could start a fight. This fight might end the night with flames, poisonous fumes, or furniture moved around violently.
This isn’t just about following rules; it’s about keeping volatile substances safe. The key rule is simple: keep incompatible materials apart. Why? To avoid the unexpected chemical reaction that no one wants.
We’re going beyond just following rules. This article explores the why and how of creating a safe storage system. It’s not like a heist movie’s list of “items that must never, ever meet.”
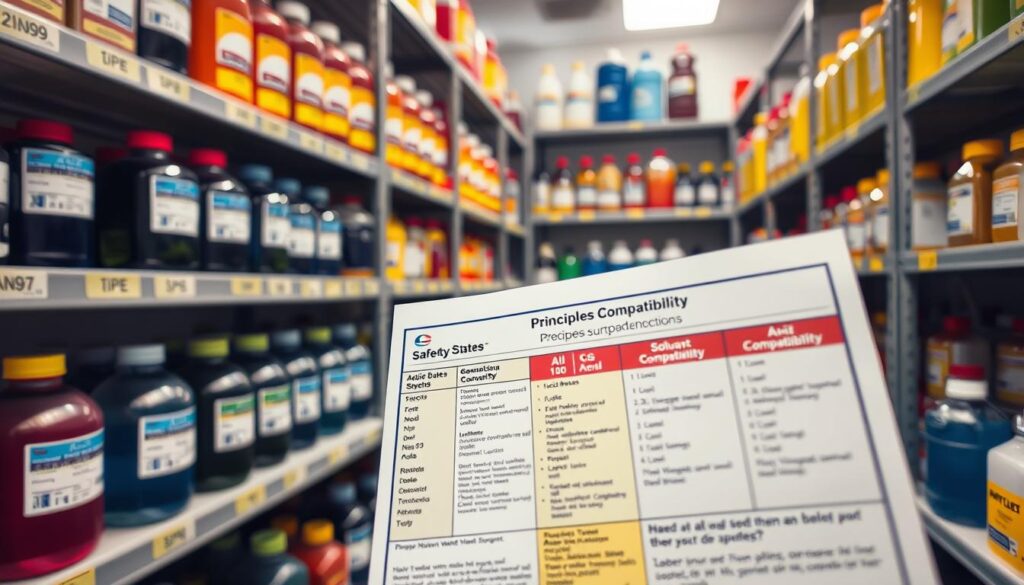
We’ll use the logic of an incompatibility chart and safety data to keep things organized. It’s like feng shui for places that might face the apocalypse.
Why incompatibilities drive layout decisions
If chemistry had a dating app, the official segregation table would be its list of blocked profiles and mandatory restraining orders. We don’t store chemicals based on alphabetical order or container size. Instead, we store them based on which ones will, quite literally, start a fight if they get too close. This isn’t just about following rules; it’s about preventing fights on a molecular level.
Every good segregation chart uses two key symbols: the “X” and the “O“. An “X” means never the twain shall meet—a hard stop. An “O,” on the other hand, is the star of our show. It doesn’t mean “maybe avoid.” It sets a specific segregation distance, usually three meters or more. Think of that space as a demilitarized zone.
Why is this distance so important? Because chemistry’s “frenemies” don’t just disagree; they react. Violently. We separate oxidizers from organics for the same reason you don’t store fireworks in a furnace. The risk isn’t just fire; it’s a fast, heat-releasing reaction that can spread quickly.
Mixing an acid with a cyanide salt doesn’t just cause a small problem. It creates hydrogen cyanide gas—a silent, deadly vapor. This gas has no place in a busy warehouse.
These aren’t just hypotheticals. They are real dangers that turn spatial planning into a critical engineering control. The required segregation distance is calculated to contain spills, prevent vapor mixing, and provide a buffer zone for emergency response. It’s the difference between a minor incident and a major disaster.
| Hazardous Pair | Potential Reaction | Minimum Segregation Distance | Rationale |
|---|---|---|---|
| Strong Acids & Strong Bases | Violent neutralization with extreme heat and spattering. | 3 meters | Prevents heat/fume interaction and splash risk. |
| Oxidizers & Organic Materials | Intense fire or explosion risk. | 3 meters | Breaks the “fuel and oxygen” proximity critical for ignition. |
| Acids & Cyanide Salts | Generation of lethal hydrogen cyanide (HCN) gas. | 5 meters (or more) | Provides dilution zone for highly toxic, lighter-than-air vapor. |
| Bleach (Hypochlorite) & Acids | Release of toxic chlorine gas. | 3 meters | Prevents common, accidental mixing during handling. |
For the most volatile relationships, even a few meters of aisle isn’t enough. Regulations, like those for organic peroxides or highly pyrophoric materials, demand detached buildings. This is the layout decision taken to its logical extreme. When a substance can self-heat to ignition or decompose explosively, the only safe segregation distance is measured in walls and rooftops.
So, when you look at a warehouse layout dotted with cabinets, berms, and wide aisles, you’re not looking at convenience. You’re looking at a carefully designed defense system. Each decision—where to place a drum, how far to space a shelf—is a calculated move against chaos. It acknowledges that some chemical relationships are so toxic, the only responsible choice is to keep them firmly, and definitively, apart.
Grouping by Hazard Class (GHS/DOT/NFPA References)
The first rule of chemical storage club: you don’t sort by name. You sort by the danger they pose. Alphabetical storage looks neat but ignores the real danger of mixing substances.
Professional safety relies on sorting by hazard class. You learn three new alphabets: GHS pictograms, DOT codes, and NFPA diamonds. This trio is the key to chemical safety, turning vague labels into clear storage plans.
The NFPA divides flammable liquids into detailed categories. We have Class IA (flash point below 73°F, boiling point below 100°F), IB (flash point below 73°F, boiling point at or above 100°F), IC (flash point at or above 73°F but below 100°F), Class II (flash point at or above 100°F but below 140°F), and Class IIIA (flash point at or above 140°F but below 200°F). It’s a spectrum of danger, not a single category.
Class IA flammable liquids are the most dangerous. They can ignite easily at room temperature. Their danger level, found on Safety Data Sheets, guides everything from cabinet choice to spill control.
Then there are oxidizers—a term for compounds that help start fires. They’re like fire breath mints. Common oxidizers like permanganates and perchlorates don’t burn themselves but will help others do so. Keeping them separate from fuels is essential.
This method goes beyond simple labels like “flammable” or “corrosive”. It’s like knowing someone is “aggressive” versus knowing they’re a trained boxer. The WHMIS system groups chemicals into classes like B2 (Flammables), C (Oxidizers), and E (Corrosives), each with specific storage rules.
Storing oxidizers means recognizing they’re not just sitting there. They’re waiting for the right moment to act. This approach informs your chemical storage guidelines for safety cabinets. You choose a cabinet based on the substance’s hazard level, not just its name.
Grouping by hazard class makes your warehouse floor safer. It’s like creating a map of danger levels. When every container is in its right place, you’ve built a strong defense against accidents.
High‑risk pairs to separate (acids/bases; oxidizers/organics; acids/cyanides; bleach/acids)
In the world of chemical storage, some pairs are so toxic they need to be kept apart forever. These aren’t just minor issues; they’re explosive situations waiting for something to trigger them. Your warehouse layout is like a legal document that keeps these dangerous pairs apart.

Acids vs. Bases: The Classic Divorce. This is chemistry’s most famous feud. Mixing a strong acid and a strong base doesn’t just cancel them out. It causes a violent, exothermic reaction. It’s like a custody battle over protons—it gets hot, fast, and can spray hazardous material everywhere. They simply cannot share a shelf.
Oxidizers and Organics: The Arsonist and the Fuel. This pair is a fundamental fire risk. An oxidizer (like nitrates, peroxides) provides the oxygen, while organics (solvents, oils, fuels) provide the fuel. Storing them together is like leaving a lit match in a hayloft. It’s not a question of if a fire starts, but when and how ferociously.
Acids and Cyanides: The Silent Killer. This is the plot twist worthy of an Agatha Christie novel. It looks innocent—a bottle of acid near a salt like sodium cyanide. But if they meet, they don’t just fizz. They generate hydrogen cyanide gas, a deadly poison that can incapacitate in minutes. It’s a tragic ending you can prevent with simple spatial awareness.
Bleach and Acids: The Household Hazard. Here’s where common sense fails. Someone thinks, “I’ll clean this with bleach and vinegar for extra power.” What they’ve actually done is weaponize their cleaner. Mixing bleach (a hypochlorite, which is an oxidizer) with any acid produces chlorine gas. Yes, that chlorine gas. It’s a WWI-era reminder that everyday chemicals demand respect.
The specific reactions are brutally efficient:
- Nitric Acid + Hydrochloric Acid: Creates toxic chlorine gas.
- Any Acid + Cyanide Salts: Produces lethal hydrogen cyanide gas.
- Bleach (Hypochlorite) + Any Acid: Again, produces chlorine gas.
Understanding these acids vs bases dynamics and the unique threat of cyanides isn’t abstract theory. It’s the knowledge that turns a routine spill into a headline—or prevents it from ever being one. Your segregation strategy starts by mapping out where these arch-enemies are and building a wall between them.
Physical separation: cabinets, berms, partitions, distance, dedicated rooms
The three-meter rule is not just a suggestion. It’s a critical buffer zone for your most volatile items. Knowing who can’t be near whom is key. But, designing the space to prevent disasters is equally important.
Dedicated cabinets are your first line of defense. Think of a fire-code-approved flammable cabinet as a steel safe. It protects its contents from fire for a key period. For acids and corrosives, you need a cabinet with an exhaust system, like a fume hood’s basement.
But cabinets can leak. That’s where secondary containment comes in. Berms and separate drip trays act as a spill moat. They contain spills, preventing them from mixing with incompatible substances. It’s a simple, effective fail-safe.
When cabinets and moats aren’t enough, you need empty space. Segregation distance becomes your best friend here. Codes often require a minimum of three meters (about 10 feet) between incompatible groups. This buffer zone prevents spills, vapor drift, or fires from easily spreading.
For the truly volatile celebrities—like organic peroxides or pyrophorics—you need a solo space. A detached building or a dedicated, fortified room is the only sensible option. Partitions and walls can create smaller zones within a larger room. But for extreme hazards, nothing beats a dedicated space. It’s like giving a rock star their own green room, far from the rest of the band.
Smart storage is about designing for intelligent failure points. You assume something will eventually leak, break, or heat up. Your job is to ensure that when it does, the reaction is a fizzle, not an explosion. Using cabinets, berms, distance, and rooms in layers creates a defense-in-depth. This makes your segregation distance plan resilient, not just a line on a diagram.
Shelf design: lip heights, corrosion‑proof trays, load ratings
A shelf without a lip is like a comedy club without a bouncer: something volatile will hit the floor. This isn’t a metaphor; it’s basic physics. One accidental bump, and a bottle of concentrated HCl starts a tragic play called “Spill on Aisle Five.” Good shelf design is key to lab safety, keeping the chemical drama contained.
The lip on a shelf is your first defense. Data shows chemicals should be stored on shelves with a small lip to prevent bottles from falling. But not all lips are the same. Too high, and it’s useless; too low, and it’s a tripping hazard.
The ideal lip height is about half an inch to an inch. It stops a rolling container without creating a spill basin.
Now, let’s talk about the tray. This is where material science meets safety. You wouldn’t store fine wine in a lead cup, so why put a corrosive in a reactive tray? A key warning is to never use aluminum trays for caustic solutions. It’s a slow-motion dissolution party you don’t want to attend.
The shelf’s structural integrity is non-negotiable. This isn’t a library for paperback novels. A single gallon of sulfuric acid weighs over 15 pounds. Now imagine a shelf holding a dozen of them, plus solvents, plus oxidizers.
Ignoring the load rating is a structural comedy that turns into a tragedy fast. Every shelf must be rated for the anticipated weight, with a significant safety margin. Overloading is a silent failure waiting for a catalyst—like a seismic tremor or an over-enthusiastic intern.
Also, the data warns against storing oxidizers directly on combustible wooden shelving. It’s a fire waiting for a spark. The shelf material must be compatible with its chemical tenants. Steel shelving with a chemical-resistant coating is often the best bet for general use, providing both strength and inertness.
In practice, your chemical storage shelf checklist should include:
- Adequate lip height (≥ 0.5″) to prevent container roll-off.
- Correct tray material: Plastic for most acids and solvents; avoid aluminum for caustics.
- Verified load rating that exceeds your total stored weight by a wide margin.
- Non-combustible construction, specially for oxidizers and flammables.
Getting this right is a quiet victory. No one throws a party for a well-designed shelf. But when every bottle stays put, every tray contains its assigned drama, and the structure doesn’t groan under the weight, you’ve built the foundation for true safety. It’s the bouncer doing its job so the star performers—your researchers—can focus on the show.
Receiving and put‑away workflow to prevent mixing errors
Imagine a new chemical arriving at your dock like an uninvited guest at a party—you need to know who it doesn’t get along with before letting it in. Tossing it onto a shelf alphabetically is the logistical equivalent of hoping for the best. That’s a strategy for a sitcom, not a safe warehouse.
Your antidote to chaos isn’t a fancy robot. It’s a document you already have: the Safety Data Sheet. Think of it not as paperwork to file, but as a pre-storage tactical briefing. This workflow turns every receiving clerk and stockroom staffer into a safety analyst. They make deliberate choices long before a container touches a shelf.
 before moving chemicals into storage. In the foreground, a professional in business attire is holding an SDS booklet, inspecting labels on translucent chemical containers. The middle ground features a well-organized receiving area, with clearly labeled shelves and protective equipment like gloves and goggles placed neatly. In the background, soft lighting illuminates the space, creating a clean and safe atmosphere. The angle captures the workflow from a slightly elevated viewpoint, emphasizing orderliness and safety protocols. Overall, the mood is focused and professional, highlighting the importance of compliance in chemical handling.")
The magic happens in three specific SDS sections. Forget skimming; this is targeted intel gathering.
- Go to Section 14 (Transport Information). This is your cheat sheet. It gives you the official DOT hazard class and packing group. That’s the chemical’s public identity. It tells you, broadly, what family it belongs to. It’s the first clue about who its natural enemies might be.
- Pivot to Section 10 (Stability and Reactivity). This is the gossip column. Here, you’ll find the explicit list of materials and conditions the substance is incompatible with. Acids to avoid? Oxidizers it hates? This section spells out the bad roommate situations. This is your non-negotiable separation list.
- Lastly, check Section 7 (Handling and Storage). This is the instruction manual for its new home. Does it need a cool, dry place? Protection from light? Specific ventilation? This tells you the physical environment it requires, complementing the social rules from Section 10.
Armed with this triage of data, the actual put-away decision becomes logical, not guesswork. The worker isn’t just finding an empty spot. They’re answering a checklist: Is the designated storage zone compatible with its hazard class? Are its sworn enemies (from Section 10) physically separated by a cabinet, berm, or sufficient distance? Does the shelf meet the storage conditions in Section 7?
This process builds a procedural barrier between “oops” and “oh no.” It formalizes the pause. That moment of review is what stops a strong oxidizer from being placed next to a flammable liquid just because their names start with the same letter.
Implementing this isn’t about adding red tape. It’s about adding a layer of intelligent defense. It transforms the receiving dock from a passive intake point into an active decision-making hub. The goal is simple: no chemical enters your storage ecosystem without its relationships—both good and disastrous—being fully vetted first.
Sample Segregation Matrix (Conceptual) and How to Adapt from SDS Data
A generic incompatibility chart is like a map of a city you’ve never visited. It’s helpful, but not personalized. Your chemical inventory has its own unique personality. A one-size-fits-all grid won’t capture its specific dramas and conflicts.
You need a custom playbook. This section is where we build it. We start with a universal concept. Then, we teach you how to adapt it using the script your chemicals already provided: the Safety Data Sheet.
Sample Segregation Matrix (Conceptual)
Imagine a social network for hazardous materials. Who can be friends? Who should be blocked? A conceptual segregation matrix answers this visually. It’s a simple grid where common hazard classes are checked against each other.
Think of it as a “who can sit with whom” chart for your stockroom. Green means “compatible.” Yellow signals “caution—requires controls.” Red screams “absolutely not.”
| Hazard Class | Acids | Bases | Oxidizers | Flammables | Water-Reactive |
|---|---|---|---|---|---|
| Acids | Green | Red | Yellow | Yellow | Red |
| Bases | Red | Green | Yellow | Green | Red |
| Oxidizers | Yellow | Yellow | Green | Red | Red |
| Flammables | Yellow | Green | Red | Green | Red |
| Water-Reactive | Red | Red | Red | Red | Red* |
*Water-reactive materials often require isolation from all other classes, including each other, due to violent reactions with moisture.
This table is your starting template. It’s the basic rules of the chemical dating game. But your specific inventory might have niche players with unique deal-breakers. That’s where the SDS comes in.
Your SDS is a treasure map. Sections 7, 10, and 14 hold the “X” that marks the spot for incompatibility data. Here’s how to translate that into your custom matrix.
Step 1: Mine Section 10. This is explicitly titled “Stability and Reactivity” with a subsection for “Incompatible Materials.” It lists substances and conditions to avoid. Write them down. This is your primary source.
Step 2: Decode Section 14. Transport hazard classification (DOT, GHS) confirms the broader hazard class. A chemical labeled “Oxidizer, Category 1” in Section 14 will almost always clash with flammables. Cross-reference this with your chart.
Step 3: Plot the Conflicts. Take your blank matrix. For each chemical, find its row (its primary hazard). Then, mark a red “X” in the column of every incompatible class listed in the SDS. If the SDS says “Incompatible with strong acids,” mark the “Acids” column red for that chemical.
This process turns a static poster into a dynamic, living document. It’s the difference between following a map and drawing your own based on firsthand reconnaissance. Your final, adapted incompatibility chart is your lab’s unique safety protocol, written in the language of your actual inventory.
Labeling aisles/shelves and color coding
In the world of chemical storage, color-coding and clear labels are key. They help avoid mistakes by using visual cues. Your system is great, but without clear signs, it’s hard to follow.
Think of it as a two-way communication system. The text tells you what to do clearly. The color tells you instantly, like a warning light.
Aisle markers should be big and easy to read. Forget about “Area 7-B.” Use clear signs like “FLAMMABLE LIQUIDS – NO OXIDIZERS ALLOWED.” Each shelf needs its own label to remind you of its hazard class.
The markers must be strong and in the right place. A weak or faded tag can lead to mistakes. For proper rack labeling, clarity and durability are essential.
| Label Type | Primary Purpose | Best Practice Example |
|---|---|---|
| Aisle Marker | Define zone hazard & prohibitions | “CORROSIVES ACIDS – KEEP FROM BASES” |
| Shelf Label | Reinforce specific hazard class | “ACIDS, INORGANIC (GHS Class 8)” |
| Container Label | Identify contents & per-unit risks (WHMIS 2015) | Supplier label with pictograms & hazard statements |
| Color Tape/Bin | Instant visual hazard identification | Red tape line on shelf edge for flammables |
Color is a universal language in chemical storage. It’s not just a rule; it’s a proven method. It works.
Red means flammable. Yellow means oxidizer. White or gray means corrosives. This system makes your warehouse a safety map.
This system is powerful. In emergencies or when distracted, color and symbols are processed faster than text. It can stop dangerous actions.
Your labeling strategy is the visible part of your safety plan. Text gives the rules. Color gives the warning. Together, they make errors obvious. This makes regular checks easy.
Audit routine and correction log
Your segregation matrix is like a constitution. The audit routine is like the Supreme Court, making sure everyone follows the rules. No plan is perfect, and things can go wrong. An audit is like a health check for your safety culture.
The goal isn’t to have a perfectly clean warehouse. That’s unrealistic. Instead, you aim to catch problems early. A audit routine and correction log are key to staying compliant.
Audit Routine
Having a good audit plan means checking often and deeply. Just one big check-up a year might miss small issues. A two-tiered approach works best.
Monthly Visual Checks: This is like a quick walk-through. A trained team checks the warehouse against your rules. They look for obvious mistakes, like the wrong chemicals together.
Quarterly Full Reconciliations: This is a deeper check. You match every item against your inventory and rules. It’s a chance to find and fix big mistakes.
A good audit routine includes:
- A defined checklist based on your rules.
- A consistent team of two for checks.
- Documentation of every finding, big or small.
This makes your rules real for your team.
Correction Log
Fixing errors is just the start. The real work is in what you do next. A correction log is not for shaming. It’s for learning.
A correction log helps you grow. It answers four key questions for each mistake:
- What was wrong? (e.g., “Oxidizing agent stored in organic solvents cabinet.”)
- Why did it happen? (e.g., “Received during night shift and put in nearest open space.”)
- How was it fixed? (e.g., “Moved to designated oxidizer cabinet, aisle 3.”)
- How do we prevent it? (e.g., “Update receiving SOP to mandate immediate segregation check. Add clear label to oxidizer cabinet.”)
The fourth question is key. It turns a quick fix into a lasting change. It might show you need better labels or training.
Over time, this log helps you avoid mistakes. It’s like fixing the screen door instead of swatting flies. This feedback loop makes your safety efforts dynamic and ongoing.
Training tips for warehouse teams
Your warehouse looks great, but it’s only as good as your team’s knowledge. Training is key. It turns your safety rules into a way of life.
Don’t bore them with slides. Start with stories. Use dangerous chemicals as examples. Explain why each rule is important.
Make Safety Data Sheets exciting. Turn them into interactive stories. Focus on sections 7, 10, and 14. Let your team guess where a mystery drum goes. Learning about labels is more fun this way.
Play a game where your team checks for safety mistakes. This makes them feel like they own the place. They start to understand how chemicals work together.
Real safety culture is when your team talks about safety over coffee. It’s when they catch mistakes before anyone else does. That’s what you’re aiming for. Your warehouse’s safety story should be one of success, not accidents.